

Debian 10, codename Buster, is a popular stable version that is packed with updated software packages and offers five years of support.
If you need a stable Debian-based platform for your business operations and development workflows, we cannot recommend Debian 10 highly enough.
At the moment, experts consider Debian 10 a robust and versatile Linux distribution that offers a wide range of features and capabilities.
It includes support for UEFI Secure Boot, AppArmor security, LUKS2 encryption, and the Wayland display server. In addition, Debian 10 provides a diverse selection of desktop environments, productivity software, and over 57,000 packages to meet the needs of users, developers, and system administrators.
Before you can experience the full benefit of these features, you need to install Debian 10 on your system.
So, in this tutorial, we will go through the steps of the process of installing Debian 10 on your system.
Table Of Contents
- The 8 Steps in The Debian 10 Installation Process
- The Prerequisites
- Step #1: Get the Debian 10 ISO
- Step #2: Boot the System From USB
- Step #3: Language, Location, and Keyboard Setup
- Step #4: Network Configuration
- Step #5: Set up the User Credentials
- Step #6: Disk Partitioning for Debian 10
- Step #7: The Final Setup
- Step #8: Booting the Debian 10 System
- Conclusion
- FAQs
The 8 Steps in The Debian 10 Installation Process
Let us start with the installation process. But before that let’s take a look at the prerequisites for the process.
The Prerequisites
Make sure you have the following before trying out the steps in the Debian 10 installation process:
- 10 GB free disk space.
- Support for USB/DVD Boot
- A USB for making the bootable USB
- Optional Internet Connectivity
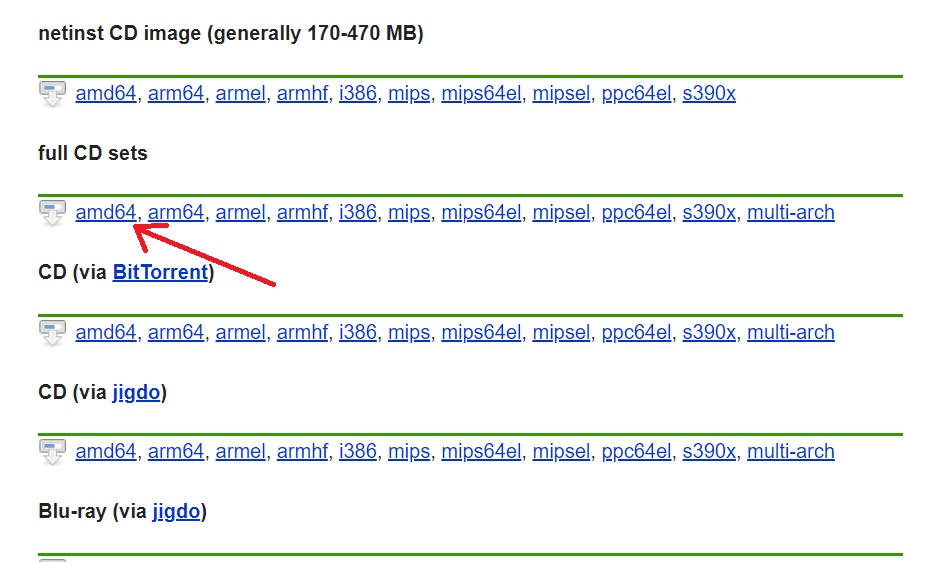
Step 1: Get the Debian 10 ISO
Start by acquiring the appropriate Debian 10 ISO file from Debian’s official site.
Choose the package that suits your requirements. For instance, consider the amd64 option for general use.
Step 2: Boot the System From USB
Make a bootable USB from the ISO image you downloaded earlier. Use Rufus or balenaEtcher to create the USB.
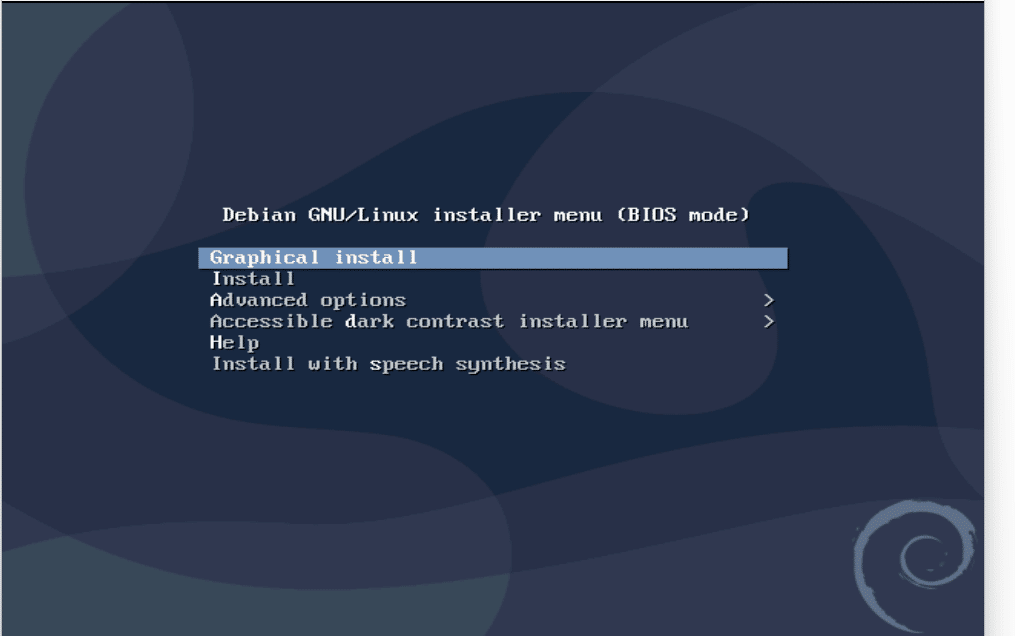
Insert the USB into the system and restart the system. When the boot menu comes up, select the USB as the first boot option.
Debian’s installer menu will appear, offering various installation options. For the purpose of this demonstration, select the Graphical Installer option.
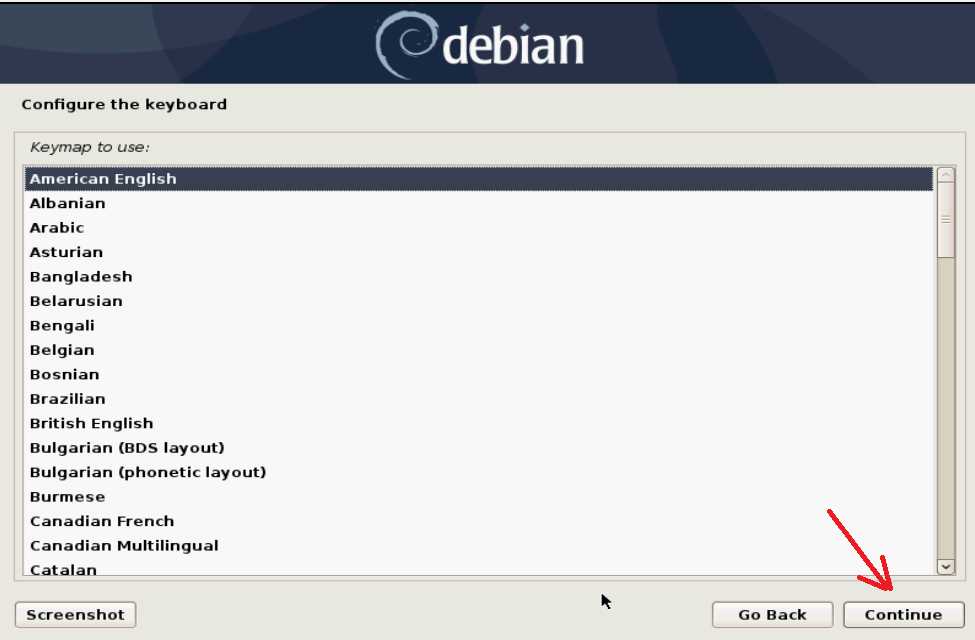
Step 3: Language, Location, and Keyboard Setup
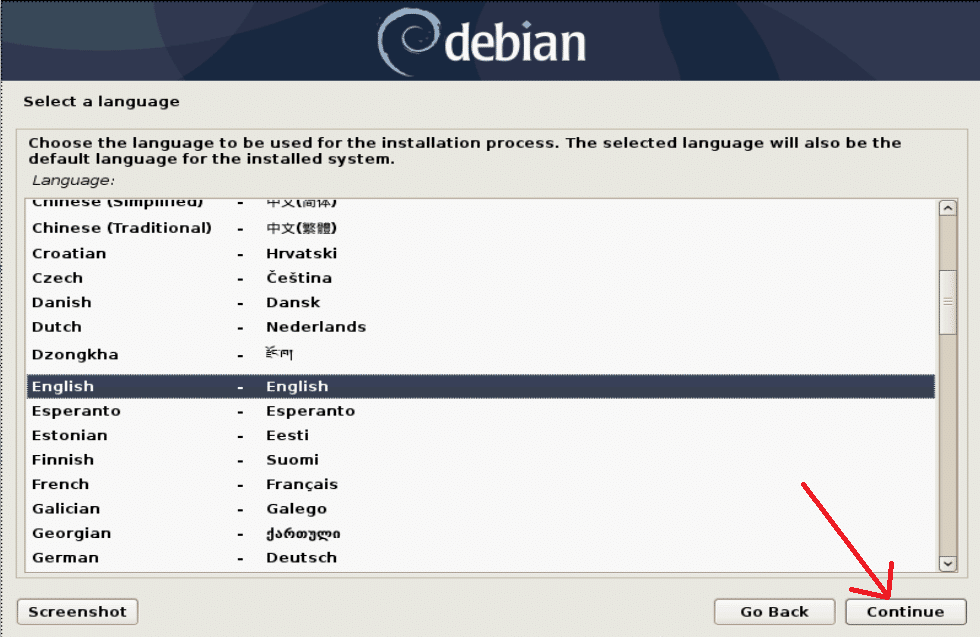
Select the language for both the installer and the operating system. Locate your preferred language and proceed by selecting Continue.
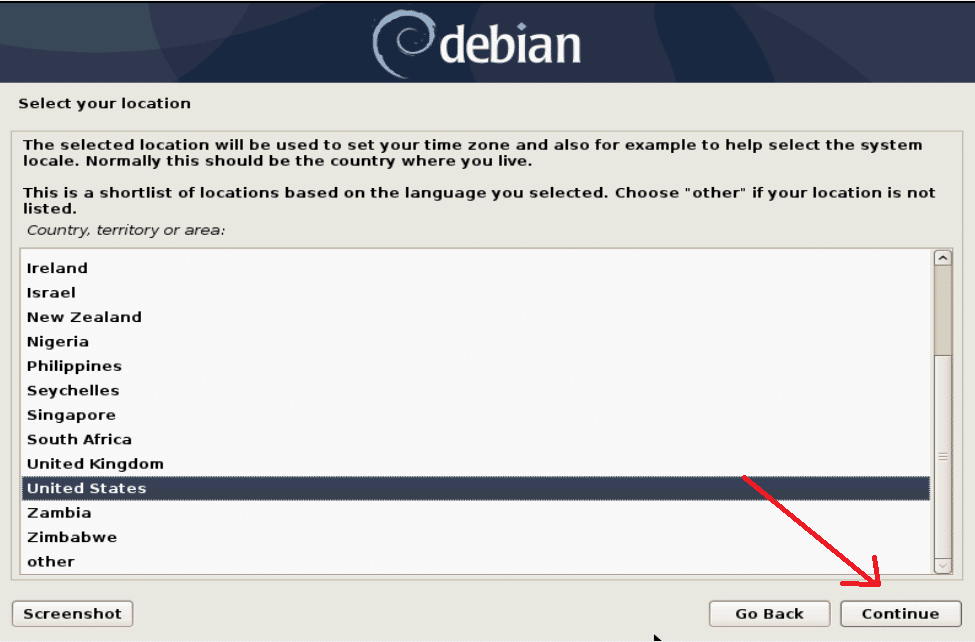
Next, select your location. Debian will adjust your time zone accordingly. If you can’t find your country, choose Other for a comprehensive list.
Proceed to your keyboard layout.
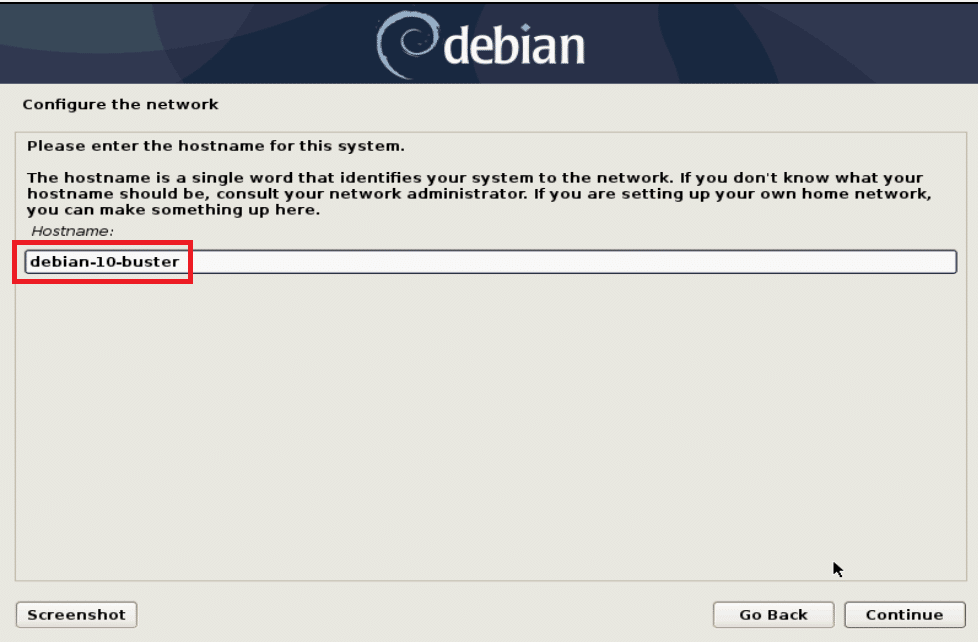
Step 4: Network Configuration
Begin network configuration by assigning your system a name (hostname). This name will identify it on the network. For simplicity, we’ve named our test system debian-10-buster.
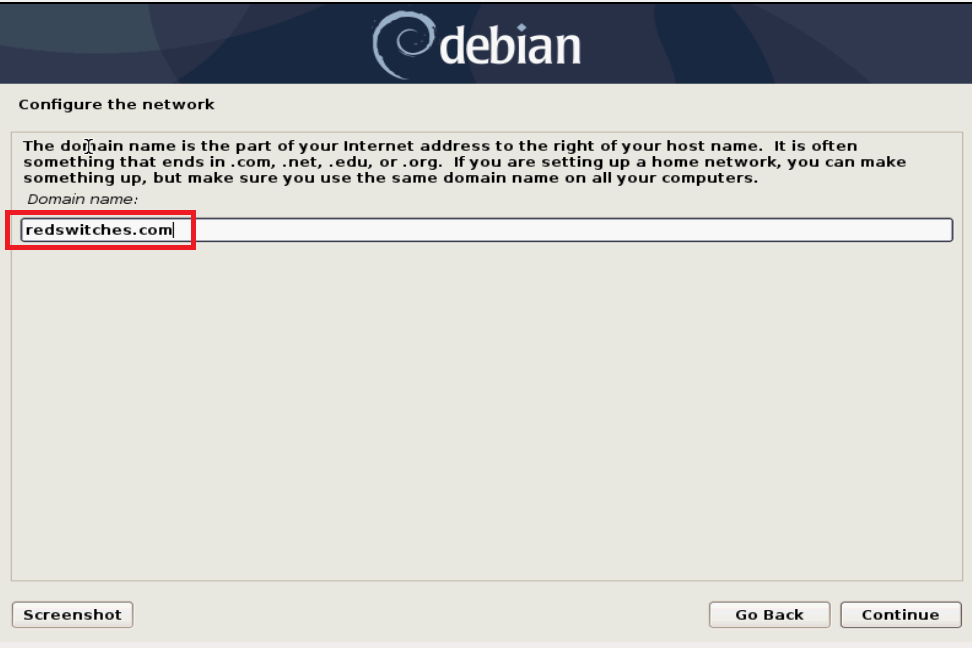
Set up a domain name as part of the network configuration. Usually, this is followed by .com, .net, .org, etc.
For personal home networks, you can use any name you prefer.
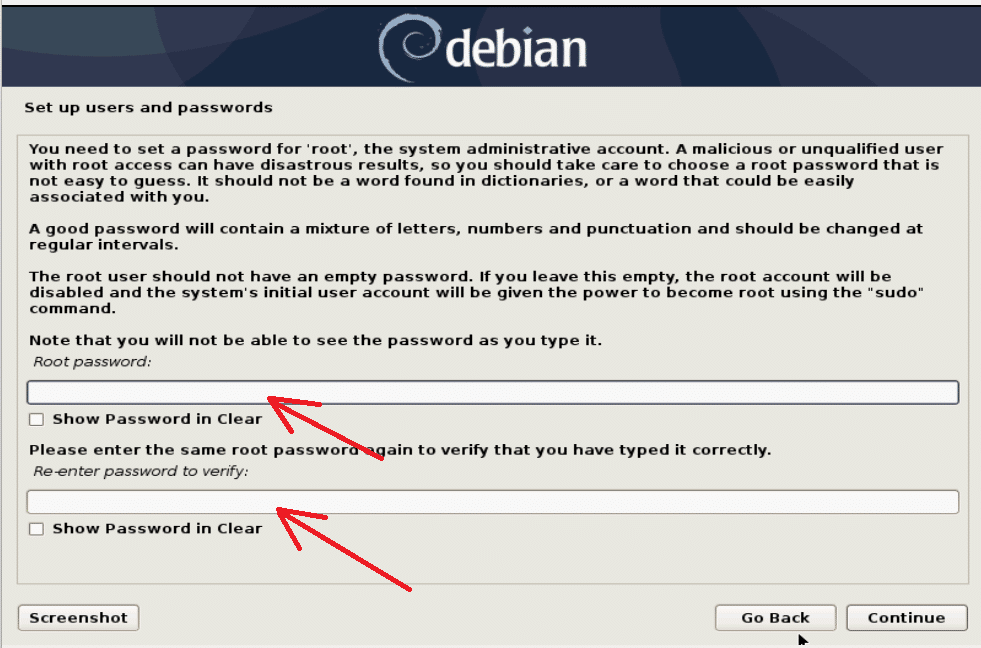
Step 5: Set up the User Credentials
Set up users and their passwords. Start by setting a password for the root user.
Remember that the best practice for strong passwords is to use a 15 or longer-character combination of letters, numbers, and punctuation. A strong password enhances system security, mitigating potential security breaches.
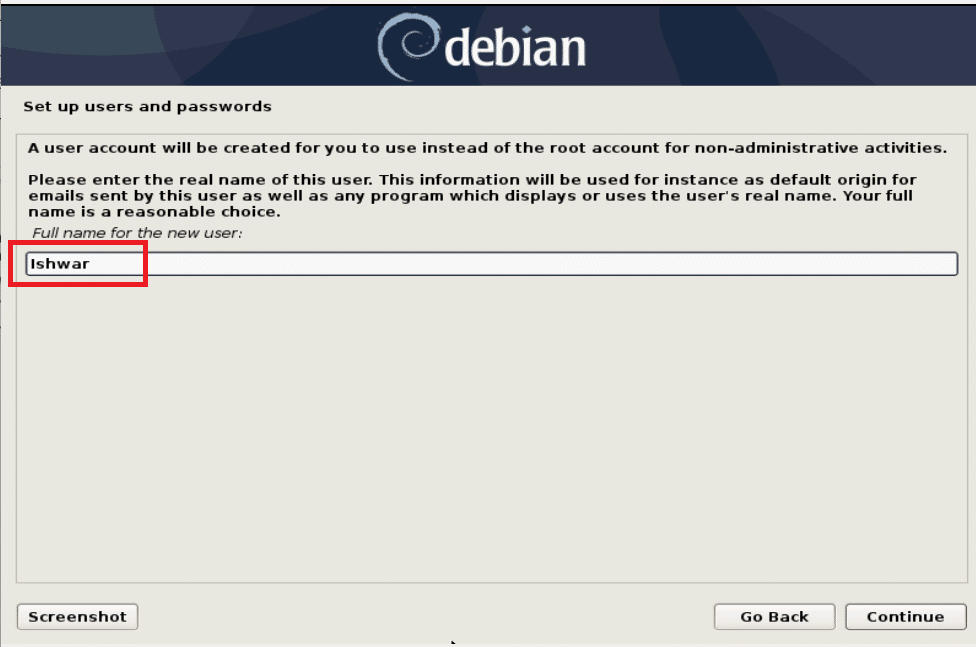
Next, create a user with a non-administrative role. Input your full name or your preferred username and click Continue to proceed.
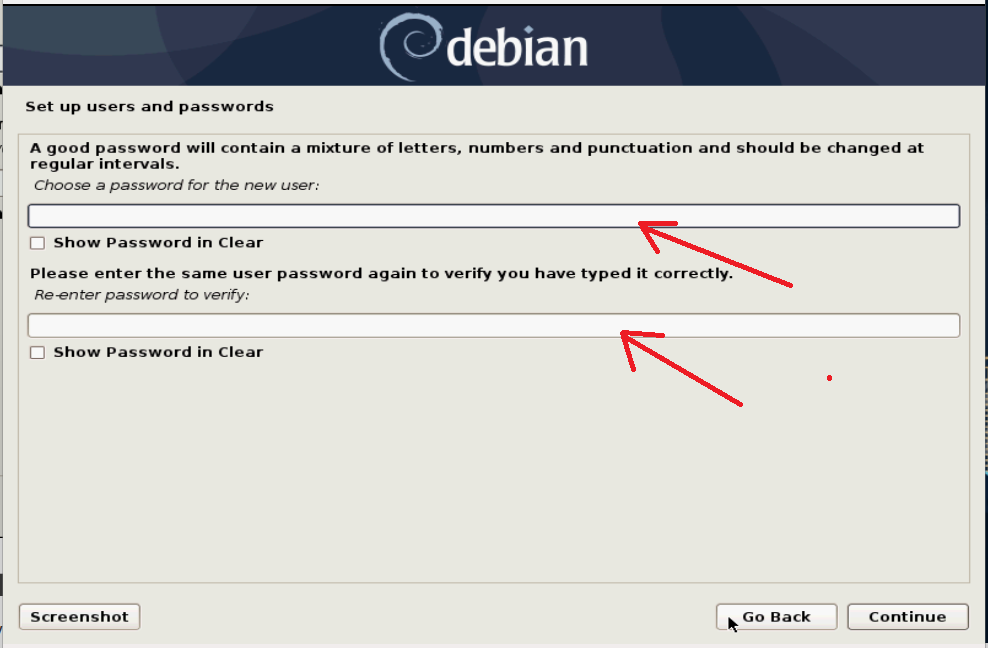
Similar to the root account, the non-root user accounts need a robust password. Create a strong password for the new user(s) and confirm it by entering it again.
Step 6: Disk Partitioning for Debian 10
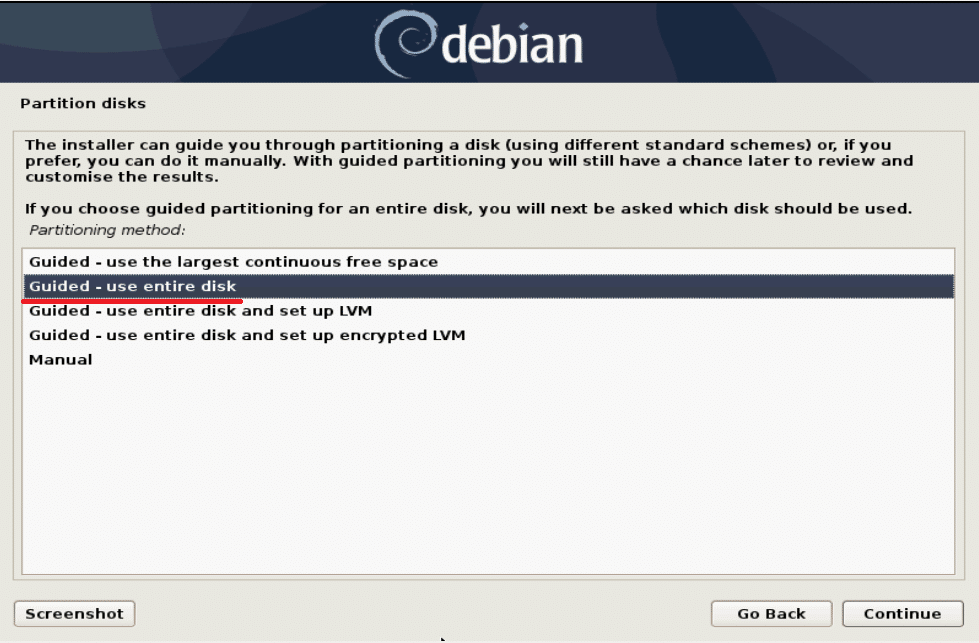
When partitioning disks, decide whether you want the installer to guide you or prefer manual partitioning.
We typically advise the Guided- use entire disk method. Note that this method will wipe out all data on the disk.
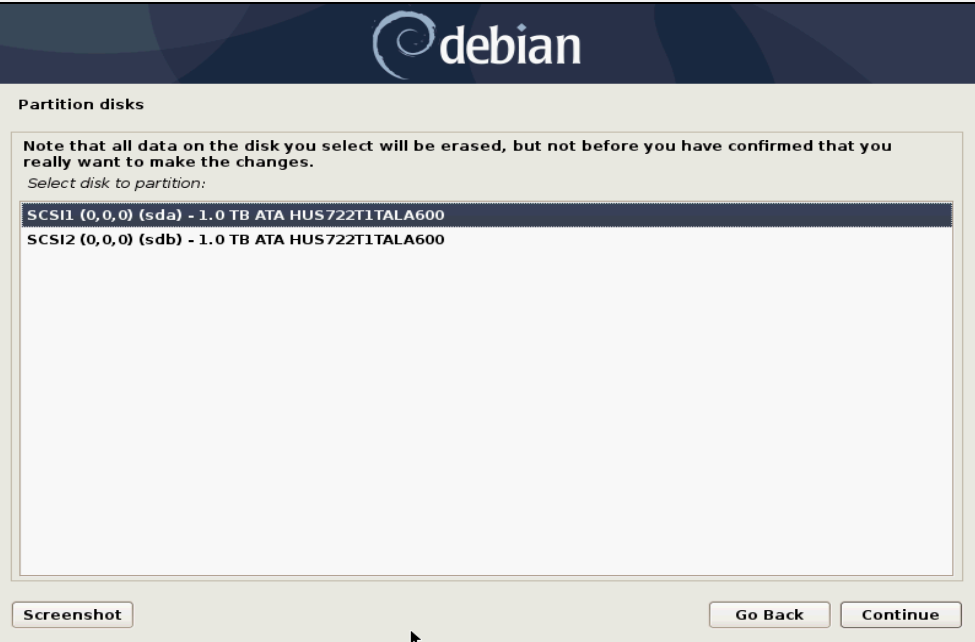
Next, choose the disk you wish to partition.
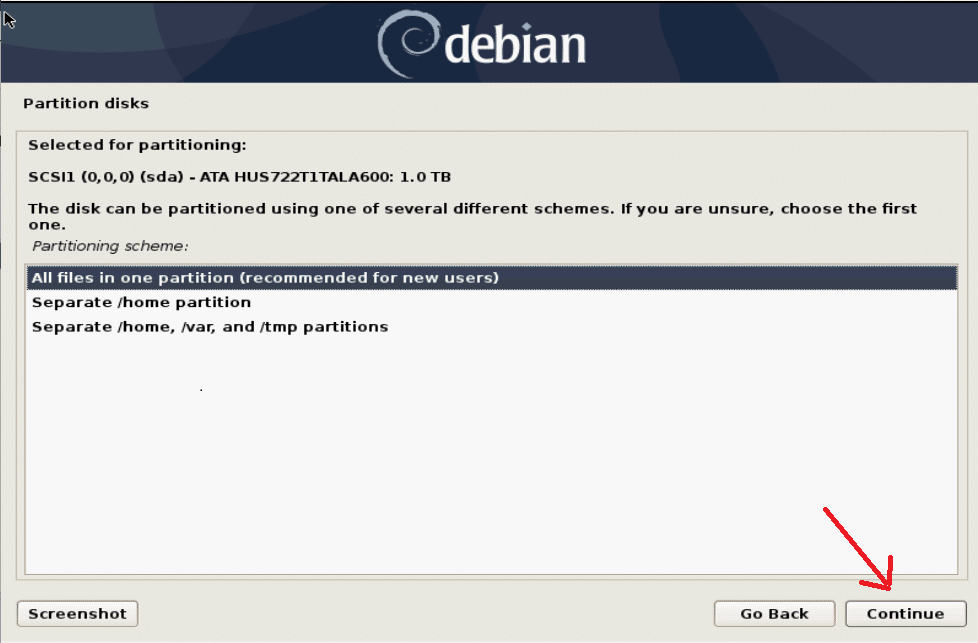
Proceed to partition the disk according to your preferred scheme.
New or inexperienced users should consider sticking with the default scheme, which keeps all files in one partition.
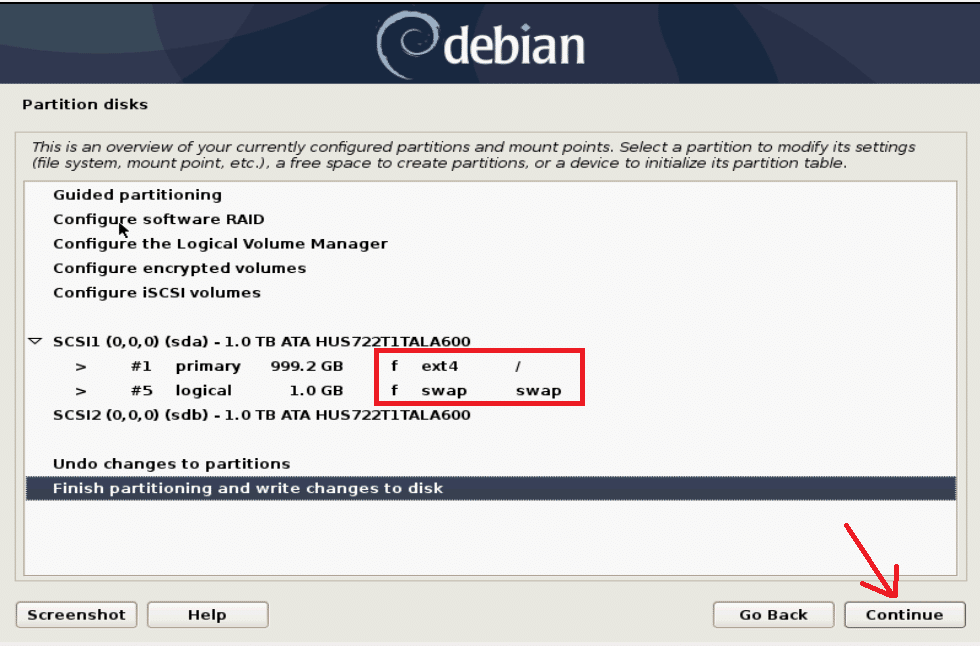
Review the installer’s disk configuration overview. If everything appears satisfactory, click Continue.
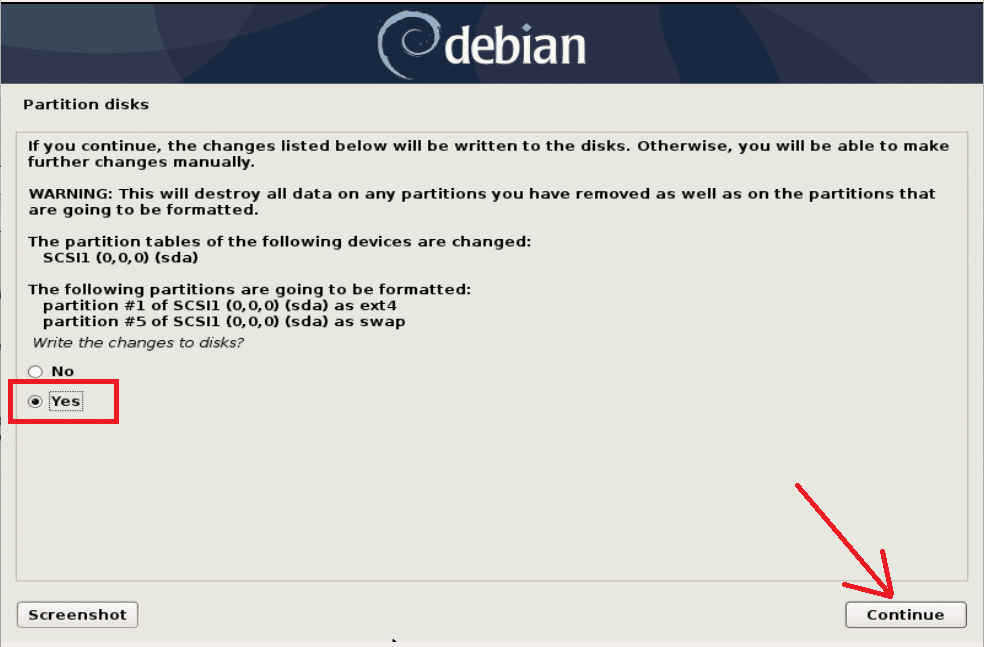
Confirm the disk changes by selecting Yes and then click Continue.
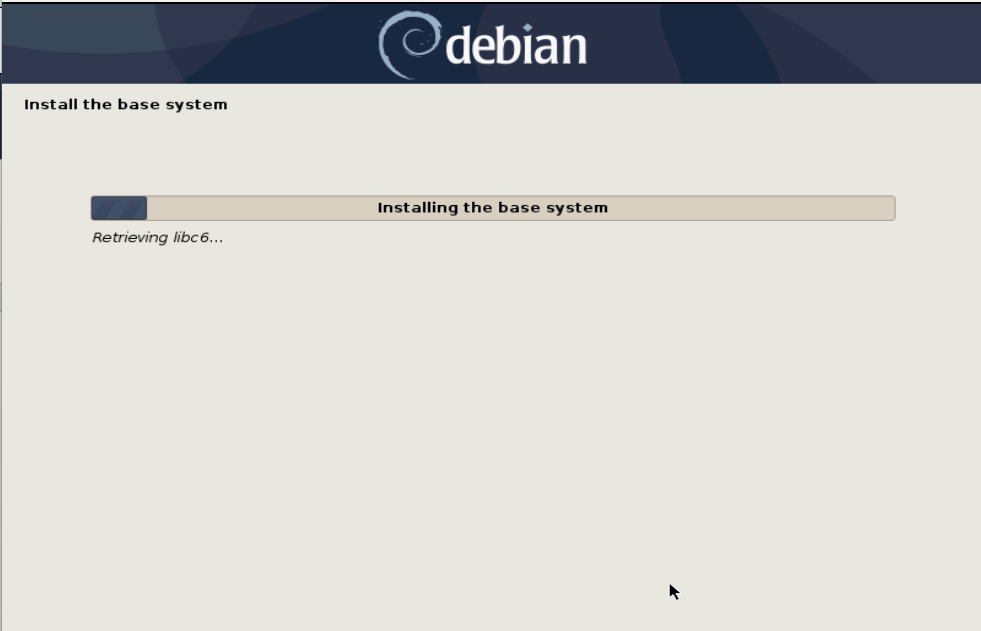
The installation process will commence and you will see a progress bar for the process.
Step 7: The Final Setup
You now need to configure the package manager. For this, ensure your system is connected to the internet. Choose Yes and click Continue to utilize the network mirror.

Next, you’ll be prompted to enter a location and the URL for the Debian package repository.
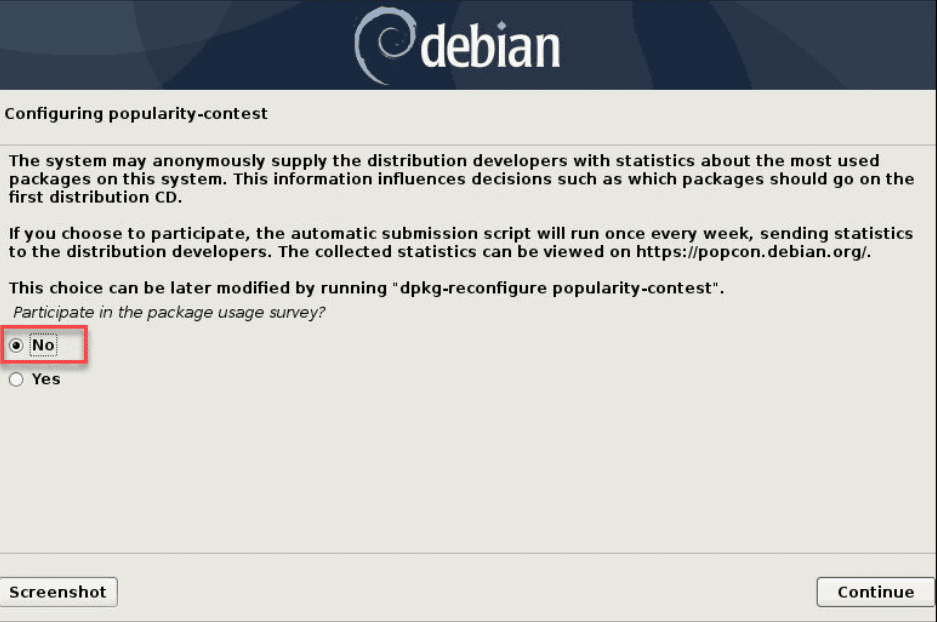
Next, you can optionally choose whether you want to participate in a package usage survey. Choosing Yes enables distribution developers to execute automatic submission scripts on your device, providing data on the most utilized packages. Alternatively, select No to keep this information private.
Next, select the software you want to pre-installed.
For instance, if you wish for Graphical User Interface (GUI), opt for GNOME. Additionally, consider installing standard system utilities and any other necessary software. Once your selections are made, click Continue.
If Debian is your computer’s only operating system, following the recommendation and installing the GRUB bootloader on the hard disk is safe.
Next, you’ll be prompted to select the device for bootloader installation.
Unless you prefer manual input, select /dev/sda.
Congratulations!
The setup and installation of Debian 10, Buster, are now complete. Click Continue to reboot the system.
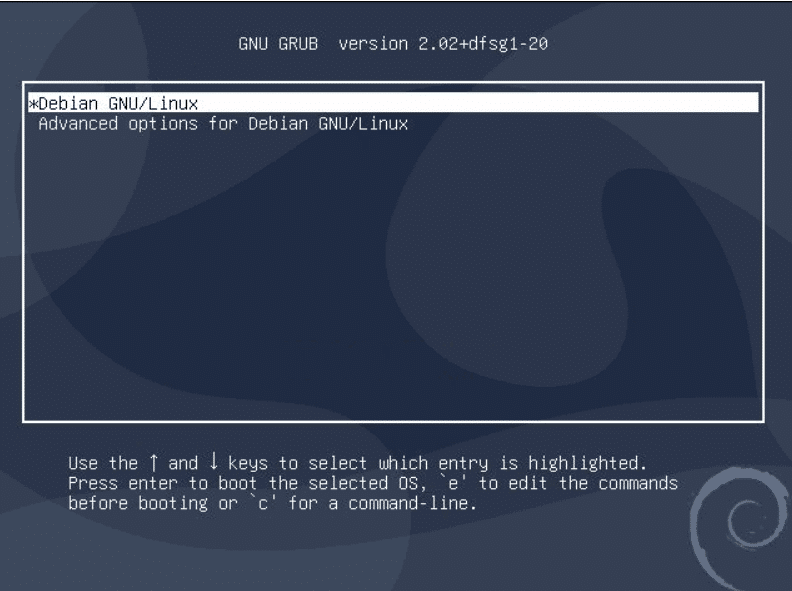
Access BIOS settings and boot from the disk with Debian Buster installed.
The GNU GRUB bootloader will appear, allowing you to choose to boot Debian GNU/Linux.
The system will request login credentials for the user account you created. Sign in by providing your username and password.
That’s it!
You should now see the Debian desktop screen. This confirms Debian 10 Buster’s successful installation on your machine.
If you wish to upgrade from Debian 10 to Debian 11, we recommend following our tutorial, which describes all critical steps in the process.
Conclusion
You’ve successfully completed the installation of Debian 10 Buster on your system by following our comprehensive tutorial. Now equipped with Debian’s powerful features, you’re ready to explore its vast potential. Whether you’re a beginner or an experienced user, Debian offers a robust platform for various applications and tasks.
Seeking dependable hosting solutions?
Consider RedSwitches, a leading dedicated server provider. We offer top-notch performance, reliability, and security to ensure your online presence thrives. Discover our dedicated server options tailored to meet your unique requirements and enjoy unmatched hosting excellence.
FAQs
Q. What is the significance of “apt update” in Debian 10 (Buster) installation?
“apt update” is a crucial command in Debian 10 (Buster) installation as it updates the package lists for upgrades and installs. It ensures that your system has the latest information about available packages in the APT repository, facilitating smooth connection for packages.
Q. Does Debian 10 (Buster) support static IP address configuration?
Yes, Debian 10 (Buster) supports configuring static IP addresses for network interfaces, allowing you to set up a static IP address for your Debian server, ensuring a consistent network setup with a static IP address.
Q. Can I install a desktop environment during Debian 10 (Buster) installation?
Yes, Debian 10 (Buster) allows installing a desktop environment during installation. Users can select from various environments to personalize their experience, including desktop environment installation options.
Q. What are the system requirements for Debian 10 (Buster) installation on virtual machines?
Debian 10 (Buster) can be installed on virtual machines with modest hardware specifications. Ensure your virtualization platform meets the requirements for smooth operation, including Debian installation, root privileges, and virtual machines.
Q. What are additional packages in Debian 10 (Buster) installation?
Additional Debian 10 (Buster) packages refer to software packages beyond the base system that users can install to extend functionality. These packages can be installed using tools like the Advanced Package Tool (APT), allowing users to customize their Debian installations according to their needs.
Q. How does the package connection work in Debian 10 (Buster)?
In Debian 10 (Buster), the connection for packages is established through the APT package management system. APT retrieves packages from official vendor repositories and installs them on the system, ensuring a reliable and secure method for managing software installations and updates.
Q. What is the purpose of the SSH Server package in Debian 10 (Buster)?
The SSH Server package in Debian 10 (Buster) enables remote access to the system via the Secure Shell (SSH) protocol. It allows users to securely log in to the Debian server over a network and perform administrative tasks or transfer files using command lines or other SSH-compatible tools.
Q. How does the apt package database function in Debian 10 (Buster)?
The apt package database in Debian 10 (Buster) maintains information about installed packages and their dependencies. It allows users to query, search, and manage packages using APT commands, ensuring efficient package management and system maintenance.
Q. How can I stay updated with the latest technical tutorials and news about Debian?
Subscribe to the biweekly newsletter to stay informed about technical tutorials, news, and updates related to Debian. This newsletter provides valuable insights into Debian development, developer cloud advancements, and economic growth in the open-source community. Sign up today to stay connected with the latest developments in the Debian ecosystem!
Q. How does the master boot record (MBR) affect Debian installations?
The master boot record (MBR) plays a crucial role in the boot process of Debian installations. It contains the initial bootloader code and partition table information, allowing the system to boot into the operating system. Understanding MBR concepts is essential for managing disk partitions and ensuring successful Debian installations.
Q. What is the role of the root user in accessing prebuilt packages from the official vendor repository?
The root user, with its elevated privileges, plays a crucial role in managing software installations on a Debian system. When prompted by the login prompt, the root user can utilize commands to search for specific prebuilt packages using a search string. These packages are sourced from the official vendor repository, such as Hollie’s Hub for Good, ensuring their authenticity and reliability. Additionally, users can opt for additional installation packages to enhance their system’s functionality. Furthermore, through the matching donation program, users can contribute to the open-source community by supporting initiatives like Hollie’s Hub for Good.
